This is something we can all try at home. It’s easier than you think and safer than pouring and stocking on gasoline.
Engines will run cleaner and air pollution is reduced. So, just ignore the energy and engine production sectors’ fear mongering and start tinkering.
The engine production industry has long been ignoring more reliable and cost effective engine designs. Take the case of the Bourke engine which contains fewer parts that run more efficiently than all those engines already in the market.
https://www.youtube.com/watch?v=c4bNOLdhchA
There are other designs like it as much as there are lots of choices on fuel that could run each of them.
Propane and LPG are just a few. How about air, water or electromagnetics?
https://www.youtube.com/watch?v=lZZGpMjJr4A
That’s for the future, although we already know it’s already here but the powers that be don’t want the Sheeples to partake them yet.
However, we can always do this to our existing engines…
Everybody can surely do the simplest method of conversion done above, but if you’re daring enough you can also do a more elaborate conversion, or buy yourself a kit.
Some of the known advantages of a propane or LPG converted engine are the following:
- natural gas cost 1/5 of gasoline; LPG cost 1/2 of gasoline;
- CO emission reduction by as much as 90%; hydrocarbon emissions decreased by more than 70%;
- softer combustion reduces noise and engine mechanical and thermal stress considerably resulting in longer engine lifespan, and;
- no lube dilution, no oil slick in carburetor when unit is not in use for a long time;
Just choose what conversion strategy is best for your situation.
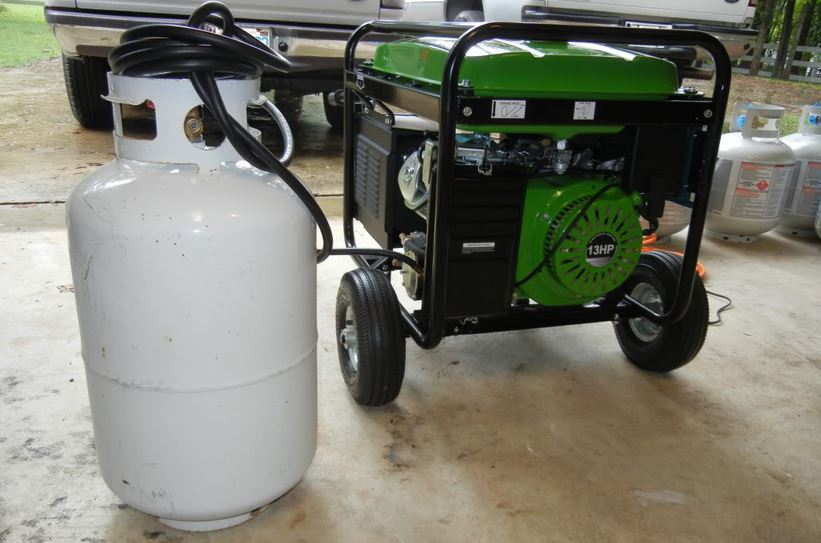
Converting a generator to run on propane
by Rainh2o
I found several ways of doing it on the web but nothing that seemed permanent or cheap. They have kits to do this but I didn’t feel like forking out 100+ bucks to do it. This project cost me about 25 bucks and that’s because I wanted new parts. If you had the parts laying around you could get out of it cheaper.

Step 1: Warnings
I run my generator outside on the driveway and know when it dies so I don’t have a problem with the way I did this. Besides, with the wind blowing, I would never have a problem with gas build up. NEVER run the generator indoors with propane or any other type of fuel for that matter. Propane is heavier than air so it will collect on the floor or near the ground when it is allowed to escape out of the tank. Use this instructable at your own risk!!
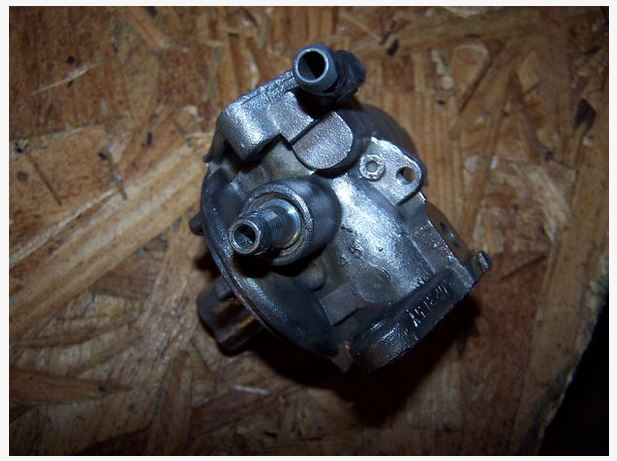
Step 2: The carburetor
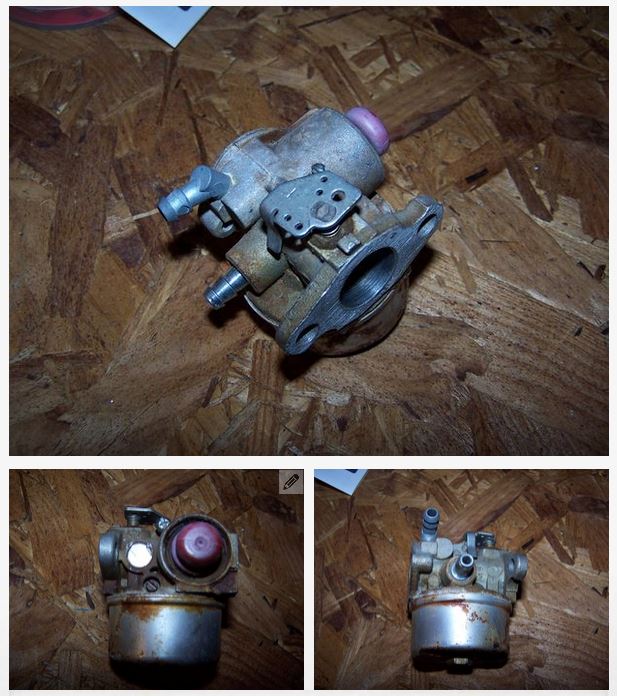
I used an old carburetor off my kids Go-Kart. It was shot and not repairable. It was physically the same size as the carb on my 10 hp generator and made by the same company. If you decide to use the carburetor off your engine be aware that this process is not reversible and it will make the carburetor totally useless for any other purpose. My advice is to obtain an old carb to convert for 3 reasons.
One, if you screw it up and it doesn’t work, then you still have your original one to put back on your engine.
Two, if you decide to later return your engine to operate off gasoline, it only takes a min or two to put the old carb back on.
Three, you will have a way to run your engine on two different types of fuels. Could be useful in a crisis when gasoline might become scarce.
You can obtain old carbs possibly by visiting a local small engine repair shop. They might give you one cheap if it cant be used on a gasoline motor anymore. Another source is to look for the same type of carb or engine that has a carb, on an old mower or some other engine that doesn’t run anymore. Look on craigs list, garage sales, ebay, neighbors backyards, trash dumps etc etc… any carb that will physically fit your engine should work for this even if it is gummed up from gasoline. Possibly if its from another mfg, just as long as the mounting flange and openings are the same.
Step 3: Remove the old float and needle valve
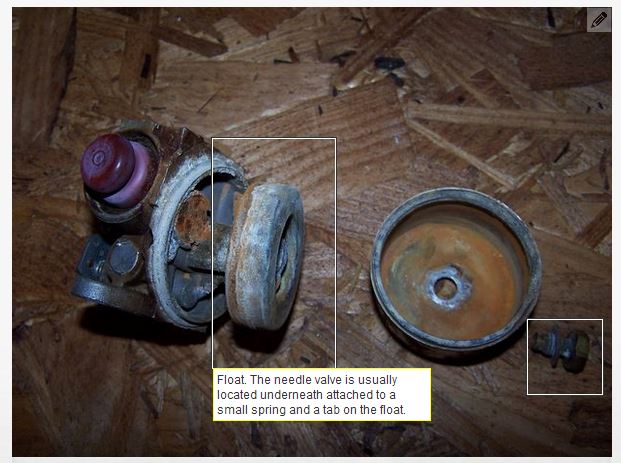
Next remove the float and the needle valve and spring. Most carbs you just have to remove the pin that the float hinges on and the float and needle valve come out all connected.
Step 4: Remove the butterfly valve


Next, remove the butterfly valve and its shaft. This is done by removing the little screw on the valve plate itself and then the shaft just lifts up and out.
Step 5: Remove idle and mixture screws/jets


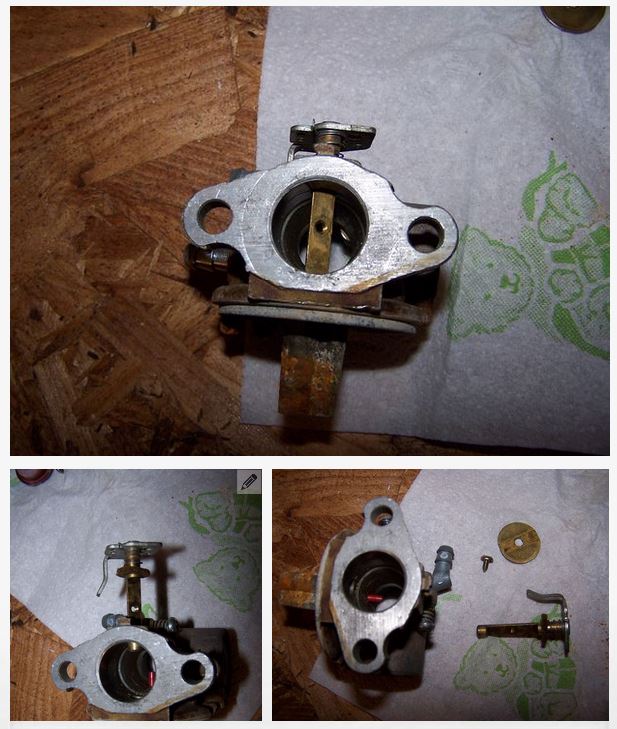
Remove the idle and mixture screws/jets. These wont be used for propane. You will end up using the new needle valve we will install to control the RPM of the motor.
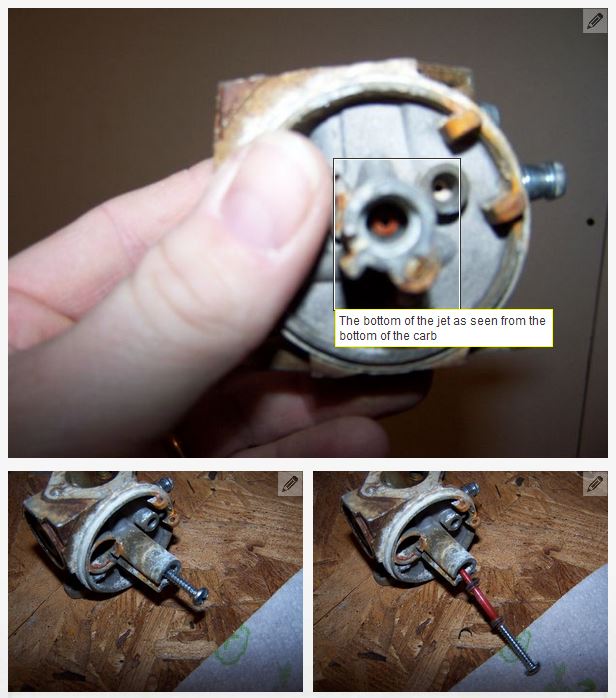
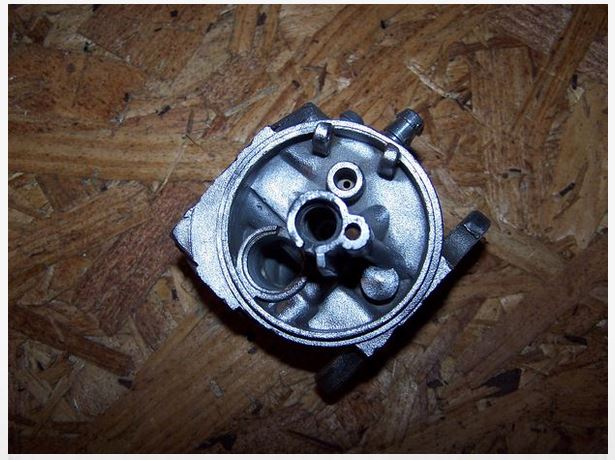
Step 6: Removing the jet hole plate cover.
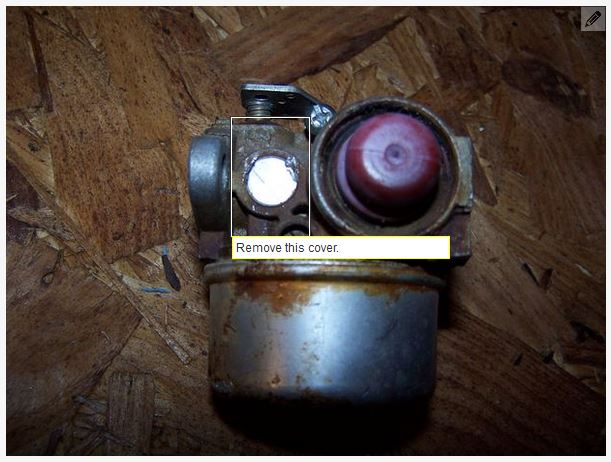
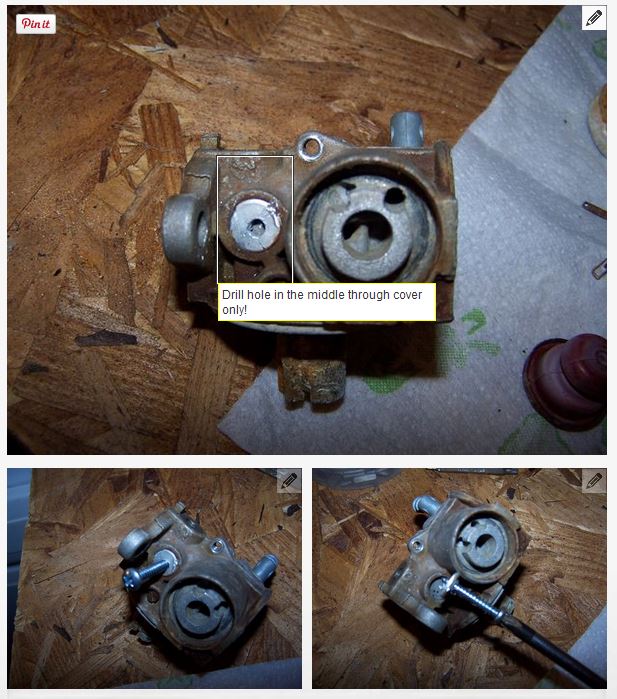
How I removed it was to first drill a hole in the cover. Be careful not to drill through the carb, just drill through the small aluminum cover. Then I installed a screw into the hole and then screwed the screw into the hole until the cover popped off. Not sure if this works on all carbs but it worked great on the one I have.
Step 7: Primer bulb removal
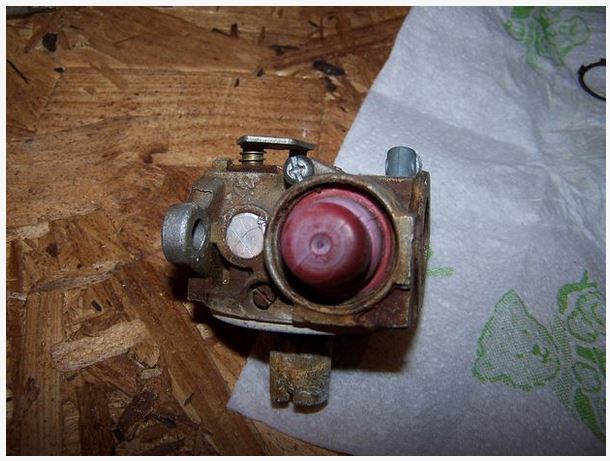
On this carb I was able to just pull on the bulb real good and it popped right off. There is a small retaining ring that may have to be pried out before removing the bulb. My ring was rusted so bad it just popped out when I pulled on the bulb.
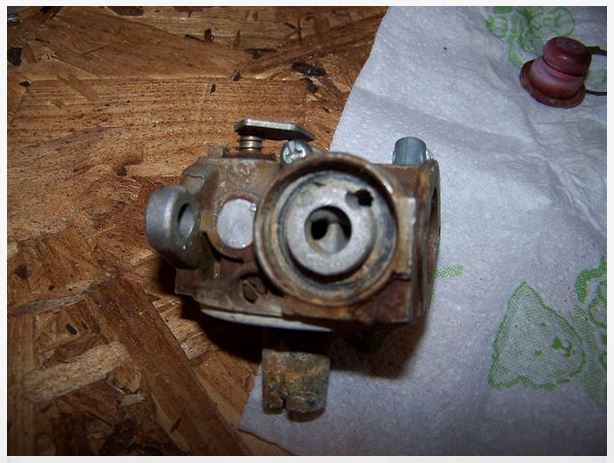
Step 8: Venturi Jet removal
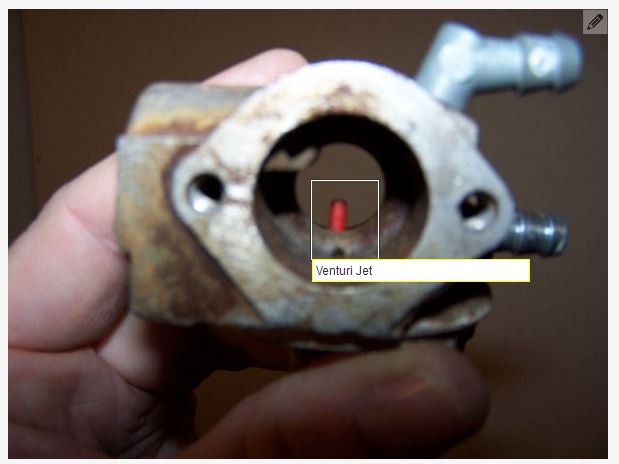
You have to remove the venturi jet. Install a screw onto the center of the jet from the bottom and then pull. The jet assembly should come out. If not don’t worry, in a later step you will drill this out but I thought it would be easier to remove it before drilling.
Step 9: Clean it up
Now clean the whole carb up. I used my dremel tool with the wire wheel attachment and a small wire brush. You could also use carb cleaner if you wanted to also.
Step 10: Drill out the venturi port
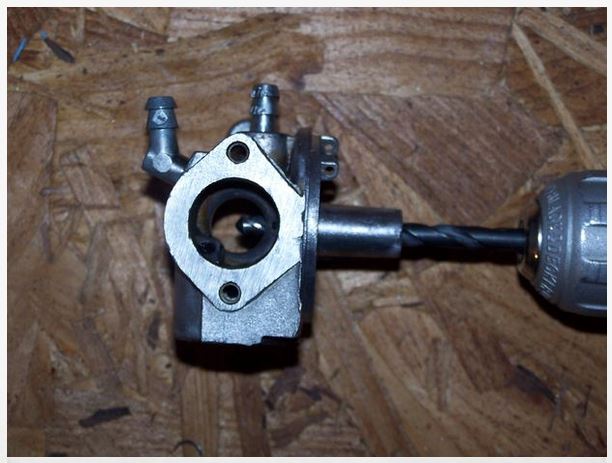
Next you have to drill out the old venturi port to accept the 1/4 tube you will install later. I used a 1/4 inch drill bit.
Be sure to drill straight.
Be sure to remove ALL metal shavings out of the carb. Any shavings left might be sucked into your motor!!! I used a chemical cleaner and cleaned it after drilling.
Step 11: Seal it up


You now have to seal up all the holes and jets. I used the black ATV silicone you can get at the auto parts store. Its heat resistant and seals good. Seal every hole and jet you see except the main venturi jet. Even seal up the old gas supply connection. Seal up the primer bulb hole as well. I ended up removing and sealing the vacuum control hole as well, this is the small nipple seen in the second picture.
Step 12: Parts for new venturi tube

You will need a BBQ grill regulator. I bought a new regulator assembly for a BBQ grill at Harbor Freight for 15 bucks. I’m sure you could get one off an old gas grill. I then used a 1/4 inch copper compression needle valve, a 3/8 flared to 3/8 male pipe thread (MPT) adapter and a 3/8 to 1/4 inch compression reducer to make the connection to my propane regulator.
What ever you end up using, reduce the connection down to 1/4 inch to match the new needle valve. This valve will be used to adjust the gas flow.
You will also need about 6 inches or so of 1/4 inch copper tubing.
Step 13: New venturi tube


I used a 3 inch piece of 1/4 inch copper tubing for the new venturi tube. When cutting copper this small, its good to deburr it after cutting so the burr wont interfere with the gas flow. I used a small file to remove the ridge inside and outside of the tube after cutting.
Step 14: Venturi assembly

Assemble the venturi assembly as show in the picture. Its pretty basic. I used Teflon tape on the connections and made sure they where tight. I used another piece of 1/4 inch tubing between the needle valves and adapters. This piece of tubing could be as long as you need it to be.
Step 15: Put it all together


**Update I figured out that the engine was getting too much air and this is why the engine ran better with the venturi in this position. I have since added a restrictor plate to the air intake as you will see in the video.**
Step 16: Mount the carb test and final assembly
Mount the carb on the motor. Be Sure to use a gasket between the carb and intake manifold. Connect the gas regulator line to the assembly and connect to a 20lb propane tank.
To start the motor, make sure the needle valve is turned off. Turn on the gas on the propane tank. Turn the needle valve about 3 turns and then quickly pull start the motor. After 2 pulls mine starts up and then I can adjust the running speed by using the needle valve. If it doesn’t start within a couple of pulls or you start to smell a strong odor of gas, turn off the gas and let the area clear before trying again. Just watch for gas build up. Do it outside in the driveway.
When it starts adjust the needle valve for best running speed. You may need to slide the whole assembly into or out of the carb to find the depth the venturi needs to be for best results. After you find this spot, mark it on the tubing and then using marine epoxi or jb weld or some other high temp epoxy, epoxy the whole assembly where the venturi tube slides into the carb.
As soon as the weather clears up I will attach more pictures of my final assembly and maybe a video on how well my motor runs and how I start it.
Step 17: Final setup and run
https://www.youtube.com/watch?feature=player_embedded&v=Em7A7kfF2uE
After messing around with this set up for a week or so, I discovered that the engine was getting too much airflow. I ended up making what I call a restrictor plate to restrict the airflow. In the video you will see the plate I made. I just mounted it to the front of the carb with one screw and adjust it according to the weather, colder weather I will have to restrict the air more, warmer weather I will have to open it up some. I set the plate so that the governor of the motor “floats” in the middle of its travel.
On a generator you have to get it up to a certain speed for maximum power and frequency generation, without a tachometer I figured if the governor was about in the middle, it was running about the correct speed. Load tests of about 35 amps confirm the generator is able to deliver what it is supposed to without the motor dying or any other problems. It does load up but it never died.
It was mentioned about the lines freezing up in one of the questions, I was not able to see any ice or signs of freezing, but the temp was about 20 degrees when I tested this thing. I don’t know what it would do in warmer weather. I let the thing run for about 2 hours with no problems. I also did away with the 90 degree elbow I mentioned earlier.
I did not like the way the 1/4 inch line vibrated with the elbow on, so I ended up as you can see in the video just making a gentle sweep into the carb.
Finally, you can extend your conversion to HHO gas with off the self or preassembled kits.


Shop around and start saving on fuel costs and save your engines before they become worthless scraps.
[…] manufacturers are producing HHO fuel savers which can be easily adapted to any gasoline engines converted to run with natural gas or LPG. This is what we can do […]
[…] Save On Fuel & Engine Costs » Convert Cars, Gensets to Run on Propane, LPG, NG or HHO […]